This is a step-by-step tutorial on Prototype Stencil Printing. This tutorial will highlight the equipment needed and provide an easy to follow guide for metal stenciling.
Equipment needed:
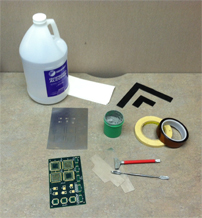 • Metal stencil
• PCB that matches the stencil
• One large L-shaped board
• One small L-shaped board
• Solder Paste
• Squeegee
• Isopropyl Alcohol
• Tape
• Paper Towel
• Tweezers
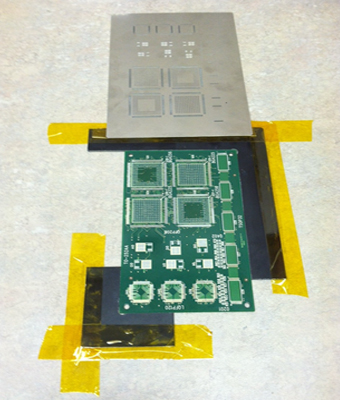
Step 1 – Setup:
1. If the board you are working on will have components on both sides, start your stencil process with the side that has less components.
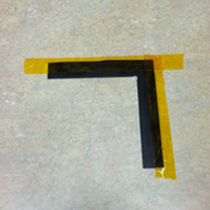
2. A board holder needs to be setup. This is done so that when the solder paste is applied using the squeegee, the board and the stencil stay level so the paste does not get into any of the
wrong apertures. If the board moves or the stencil flexes/bends, the paste can get moved around easily underneath. This holder can be made several ways. One way is you can create
two L-shaped board pieces.
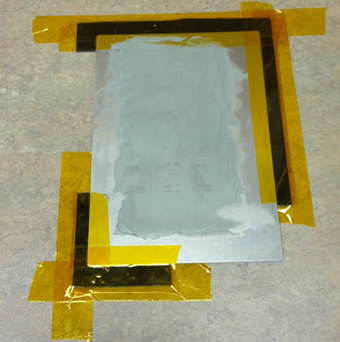
3. (I) Tape the larger board down to a level surface.
(II) Align the PCB in the corner so the sides are flush. The smaller L-shaped board will position the opposite corner.
(III) Tape the board
down and make sure the PCB is tight and the sides are even.
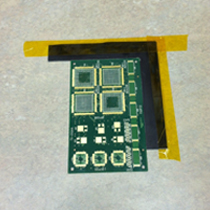
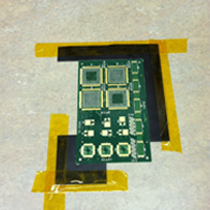
4. Once the board is fixed in place, the next step is to place the stencil on top of the PCB board aligning the correct openings. It is very important that the stencil be as close as possible for all of the apertures. Tape the edges down so the stencil doesn't move.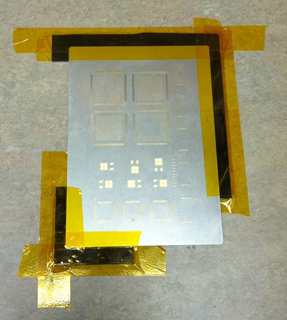
Step 2 – Solder Paste Application:
1. Now that the stencil is in the correct position, place a lump of solder paste on the stencil but try not to place it on the areas where it will fill in. Make sure the paste is stirred and mixed well before use. Most of the paste will be salvaged due to only a small amount needed to fill in the apertures. The remaining paste can be put back into the container and reused.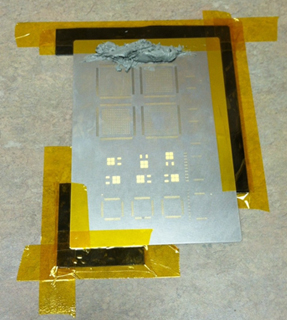
2. If necessary, place your non-dominant hand on the stencil to hold it better in place. Using the squeegee, lay on the paste at a low angle with the table to ensure paste covers all the areas.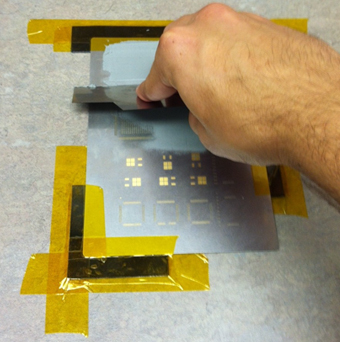
3. Repeat the same swiping process again making sure nothing was missed.
4. The final swipe should come at a higher angle with the table. Holding the squeegee almost vertically, do a final swipe across the board. This will collect the majority of the excess paste,
as well as creating a uniform layer. It may be possible that throughout this process the board slips and causes a problem. If this happens it would be beneficial to clean the metal stencil and start over.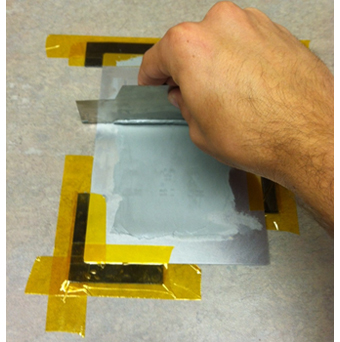
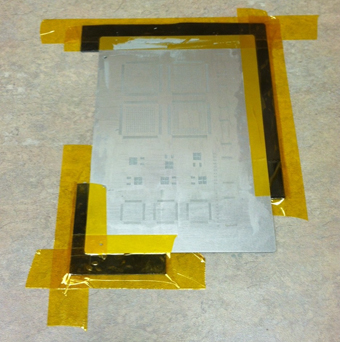
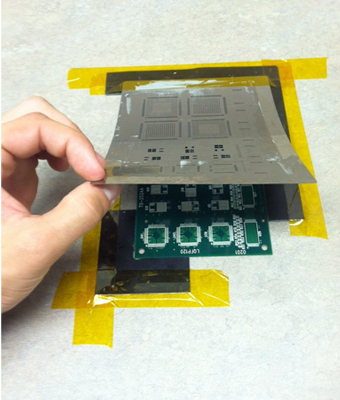
5. The next step is to remove the stencil. Do this carefully as to not disturb the paste underneath the stencil. Gently remove the tape from the smaller board the slowly lift back the stencil.
Step 3 – Inspect:
1. Make sure the solder paste has filled all the apertures and it is evenly inside the perimeter of each. If this is not the case, you may need to start the process over again. To do this, simply wipe down the board with paper towel. No solution is needed.
Step 4 – Cleaning the Stencil:
1. To ensure the stencil will be usable again, it must be properly cleaned. Using a paper towel with a little Isopropyl Alcohol, wipe down the board to remove the excess paste. Flip the stencil and clean the other side as well. If possible, use forced or compressed air to completely clean each aperture. Let the stencil dry before using again.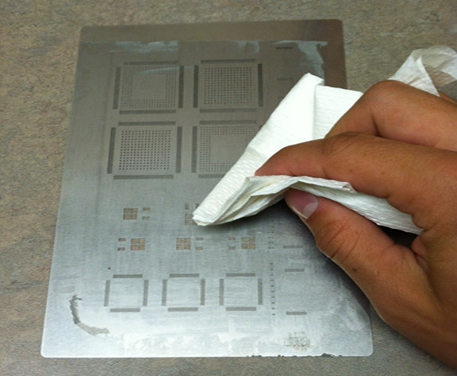
Step 5 – Placing Components:
1. One method for placing the components is by hand. Using tweezers, gently place each component in the correct position. Inspect the board. Another way this can be done is with a machine. If this is available, this method is more efficient and effective. Once all the parts are placed the next step is to reflow the PCB.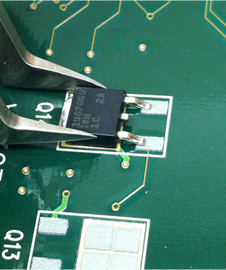
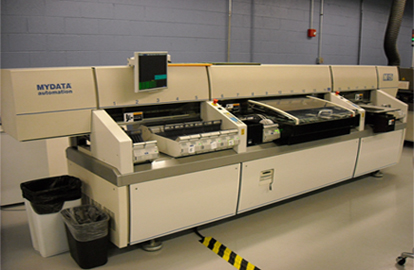
Step 5 – Reflow of PCB:
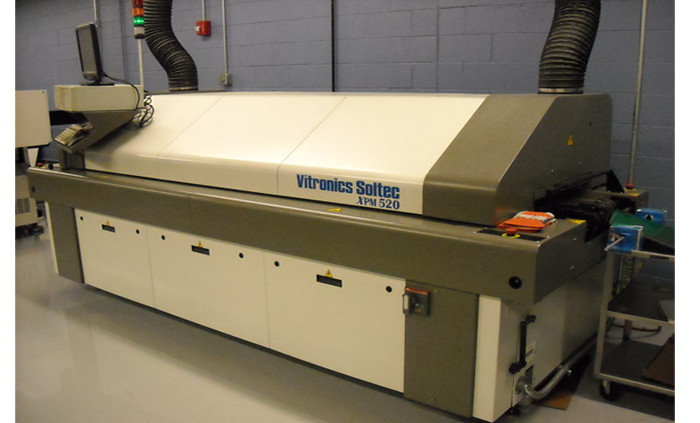
1. This step is also dependent on the tools and machinery available to you. Machines like this one, are designed specifically for this. The board will slowly travel through several different increasing heat zones until the desired temperature is achieved. Then it will go through cooling zones and the reflow is complete.